Showing posts with label Crafts. Show all posts

March 26, 2012

Spring Wreath and Decor...

I decided to make another yarn wreath for the spring time. I used the same technique as the Valentine's Day Wreath. I wanted to try a "grassy" green one but found great green yarn on clearance at Jo-Ann Fabrics and went with the cheap stuff!
Materials you need to create your own yarn wreath:
     *Yarn
     *Wreath (any kind,I used the straw one in this project)
     *Hot glue gun
     *Felt in a variety of colors
     *Scissors
I wrapped the yarn around the straw wreath (keep the plastic on the wreath makes it easier to wrap the yarn around) and tied off the end. (Not sure why I had the Peacock feather laying there!)


I created a variety of flowers out of felt, using the same technique as I did for the Valentine's Day wreath, and hot glued them on.


I hung the wreath above the shelves and added some greens in tin cans that I bought at Ikea, birds that I used on the Valentine's Day Shelves, Spring banner from Target, Page out of a magazine and placed it in a yellow frame that I already had, and added some old bunnies that I had on hand.


This weather has been gorgeous here... makes it feel like summer instead of spring.


Enjoy!
  ~Amy

March 19, 2012

Fabric Covered Letters

I had a ton of the yellow chevron fabric left from the frame project I created a few weeks ago. I think I may use some to create some flowers for my spring wreath I have been working on, but I also knew I wanted to create something else for the shelf ledge in the dining room.

FABRIC COVERED LETTERS

I picked up three letters that spell out the word EAT from Jo-Ann Fabrics.

I cut the fabric around each letter and used spray adhesive to attach the front of the letter to each piece of fabric.

I hot glued the other pieces to cover the side and back of each letter.

The letters are just leaning on the ledge.
I have been working on a ton of different projects over the weekend. I got to finish the stripes in the hallway, worked on decorating my spring shelves in the living room, a new spring wreath, and got out our Easter decor. My oldest one still thinks she is getting a new swing set from the Easter Bunny.
What did you get done this weekend?
Isn't the weather awesome? It is going to be so nice to be off two days this week.
Enjoy!
  ~Amy

March 12, 2012

Chalkboard Vase

I wanted to spruce up an existing vase that I already had. I had some chalkboard paint laying around and figured on using what I had on hand already.

First, I washed the vase and taped off the edges (using a level to make sure the tape was even) to make a nice square on the glass front.
I used a paintbrush I already had on hand and painted the inside of the square. I think spray paint would have worked better, but I didn't have any.
Applied three light coats, allowing drying time in between.
Here is the finished project with a few tulips inside. I love the smell of flowers, they are cheap, and are a natural way to make your house smell so good!


Now tell me again, how do you keep Tulips alive? I have a lot of little projects to show you as I continue to work on the striped walls. Ran out of painter's tape again!
What did you do this weekend?
Enjoy!
  ~Amy

March 6, 2012

Chevron Covered Photo Mat

I really liked the picture frames in the dining room, but they needed some sprucing up. I ordered this yellow chevron fabric from fabric.com a while ago for pillows, and thought it would look nice in these frames.
CHEVRON COVERED PHOTO MAT

(I think black and white photos will look better in the frame, so I just ordered some.)
The materials you will need are:
     *Fabric
     *Spray Adhesive
     *Scissors
     *Hot Glue and Glue Sticks
     *Ruler or Tape Measure
     *Frame with a Mat

First, spray paint the picture frame with four light coats of white paint
Take apart the picture frame and take out the mat
Measure the picture frame and then cut the material that size, leaving enough fabric to wrap around the mat.

Wrap the fabric along the mat and use spray adhesive to get the fabric to stick to the front of the mat.


Use hot glue to secure the fabric to the back of the mat.
Finally, put the frame back together and hang back on the wall.


Cover any photo mats lately? Take any pictures of your kids? Time to hang a new one on the wall!
Enjoy!
  ~Amy

February 22, 2012

Go Ahead and Paint on Your Table Runners

I had this plain white table runner around for a while now. IT WAS BORING! I purchased it from Pottery Barn about two years ago. I  needed something to dress it up, and had wished I got it monogrammed when I ordered it. When shopping in Jo-Ann Fabrics one day I had noticed that there were fabric pens and thought that I could monogram it myself.


I printed out a W from the computer and used my scissors to cut it out.


I then traced the W on the fabric, measuring first where I wanted it to be on the table runner.


I filled in the W with the fabric pen and ironed over it to seal it.


I then placed it over my burlap table runner from Valentine's Day (that I turned upside down) and here you have it?


Have you colored on any table runners lately?

Enjoy!
  ~Amy

January 25, 2012

Burlap and Felt Valentine's Day Runner


Burlap-Felt Heart table Runner

First, you need to gather all of your supplies.


  • Felt- I picked up the $0.39 cent pieces they sell at Jo-Ann Fabrics
  • Burlap- 1 1/2 yards
  • Scissors
  • Something to trace- heart templates, heart cookie cutter, or you can free hand the hearts
  • Marker or pen to trace the hearts on to the felt
  • Hot glue gun
 Cut all of the hearts out.. this may take a while


Attach and trim your burlap to make a runner down the table. You might have to hot glue or sew to make a long enough piece for the runner.


Arrange the hearts onto the burlap


Hot glue the pattern of hearts down to the burlap. Make sure you put something under the burlap so you don't glue the table!


Enjoy!
  ~Amy

January 17, 2012

I Heart Cupcakes!

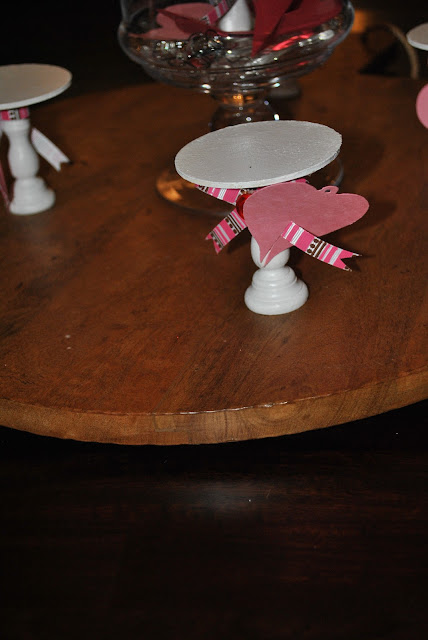
These cupcake stands were easy as pie, or cake...... or cupcake.
You only need a few things to get started:
  • One pack of 4 in. wooden candlesticks
  • Circle disks
  • Spray Paint
  • Tacky or Hot Glue
  • Ribbon, buttons, or any other embellishment you want to add!
Spray paint the candlesticks and wooden circle disks. Let dry. Glue the disk to the top of the candlestick.


Add the ribbon and any other embellishment.


I added hearts to mine for Valentine's Day.


I then saw these mailboxes at Target in the dollar bin the other day when we were there. I hot glued the mailbox to the cupcake holder.


I am going to put the girls' Valentine's Day gifts inside the mailbox.


January 12, 2012

Yarning for a Wreath

I am in love with the variety of yarn wreaths in the Blog World and thought I would try one myself. I needed a new wreath for the front door, since I stole that one to put on the shelves in the living room.


It was pretty easy to complete.


You'll just need the following to create your own:


Wreath- any wreath you have on hand
Yarn
Felt
Scissors
Any other embellishment you would like to include
Ribbon

First, Wrap the yarn all the way around the wreath. Knot your yarn at the beginning and the end. You are going to cover up the knots with felt flowers later.


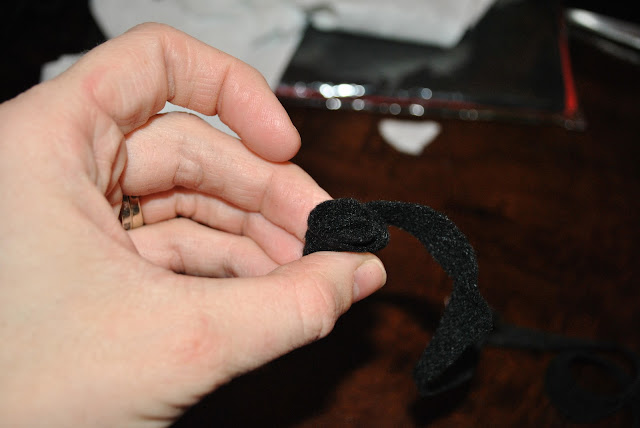
To make the felt flowers, cut the felt in a circle-swiggle pattern. Roll the felt to create the flower. Hot glue the flower on the wreath.


Add other embellishments to dress up your wreath.
Hang a ribbon from the top of the wreath and then hang it.


Enjoy!


   ~Amy